Getting Started
This section will help you walk through the minimum required setup to run project.
Required Setup
First, this is important, please make sure you have already install and run the simulator successful base on this guide with REACT-NATIVE-CLI.
https://reactnative.dev/docs/environment-setup
it will help you install and build your first Example React Native app.
Installing Node Modules
Open terminal and go to project folder and run following command
// or run yarn, this is similar to npm but could be faster
// yarn from https://yarnpkg.com
yarn
iOS Setup (Mac OS only)
Follow above link React Native CLI Quickstart -> macOS -> iOS
we are using node v12.14.1
Running Simulator
Run following command if you have installed node modules from previous command.
CocoaPods
After installation of all dependencies back to previous folder
Android Setup (Mac OS, Windows, Linux)
Change Android SDK Path
Go to
- File -> project Structure into Project Structure
- Left -> SDK Location
SDK location select Android SDK location
Running Emulator
To check the Android device is ready or not run following command from your terminal
Please make sure you use the correct Android SDK path. You can find the actual location of the SDK in the Android Studio “Preferences” dialog, under Appearance & Behavior → System Settings → Android SDK.
If you have device listed you can run following command
if you are getting error
PackageList.java:104: error: cannot find symbol
new MapsPackage(),
^
symbol: class MapsPackage
location: class PackageList
2 errors
then go to the build.gradle file android/build.gradle
and add supportLibVersion = “28.0.0” in ext{..} like this
buildToolsVersion = “28.0.3”
minSdkVersion = 16
compileSdkVersion = 28
targetSdkVersion = 28
supportLibVersion = “28.0.0” // add this
}
if you are on window and getting error metro bundle ‘react-native start’ then go to this path
\node_modules\metro-config\src\defaults\blacklist.js
and replace
to:
Woocommerce Configuration
This section will guide how to make the app work with your existing WordPress website
Required Setup
As the app is required to connect with the WordPress site and WooCommerce plugin via Rest API, please refer to the Rest Document for more detail info.
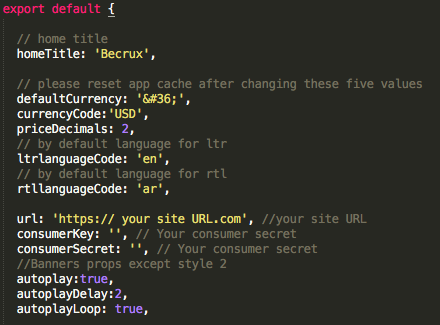
App Config
Go the project folder open the file: src/common/Theme.style.js and follow below steps to setup the app.
- https://your-site-url (it will be the url of your domain)
- consumer key
- consumer secret
- change the colors for your theme
- change default currency
- change default language for both rtl and ltr
- change price decimals to your requirement
- change home pages title
Change SplashScreen and app Icon
Android
go into android/app/src/res/mipmap(dpi,mdpi,xhdpi,xxhdpi,xxxhdpi) and replace the splashscreen image for splash screen and ic_launcher and ic_launcher_round(round shape icon) for icon (name and extension of all images should be same )

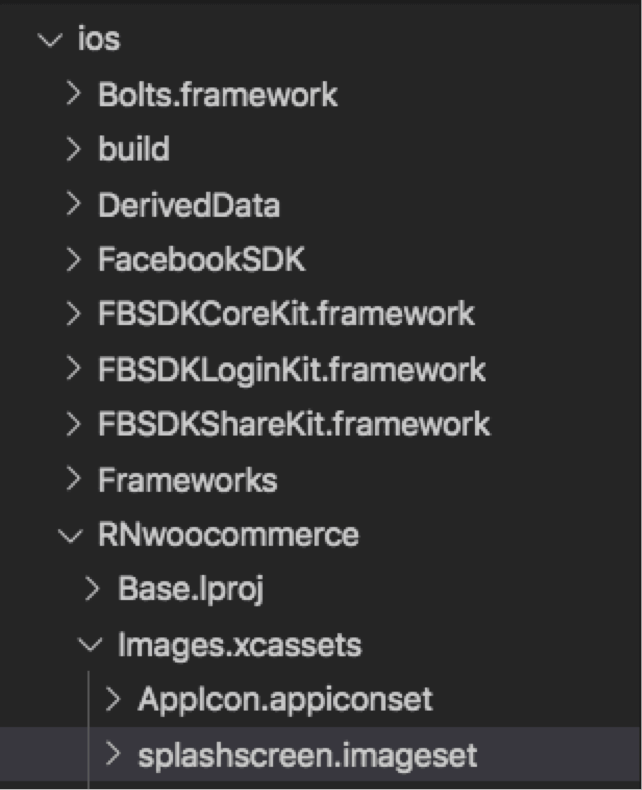
IOS
go into ios/RNBecrux/Images.xcassets/ and change the splashscreen and icon
How to Set the App Icon
Click in the Project navigator and then choose AppIcon


Now just drag the right sized image (in .png format) from Finder onto every blank in the app set. The app icon should be all set up now.
Intro Slider Images
replace that images for intro1 slider (name and extension of all images should be same )

Rate us
Android
For Rate Us button change the google package name in /screens/RateUs.js

IOS
go to WordPress site ReactEcommerce/General Settings and enter URL to iOS share app

RTL
Android
go into android/app/src/main/java/com/../MainActivity.java folder and change forceRTL() to true

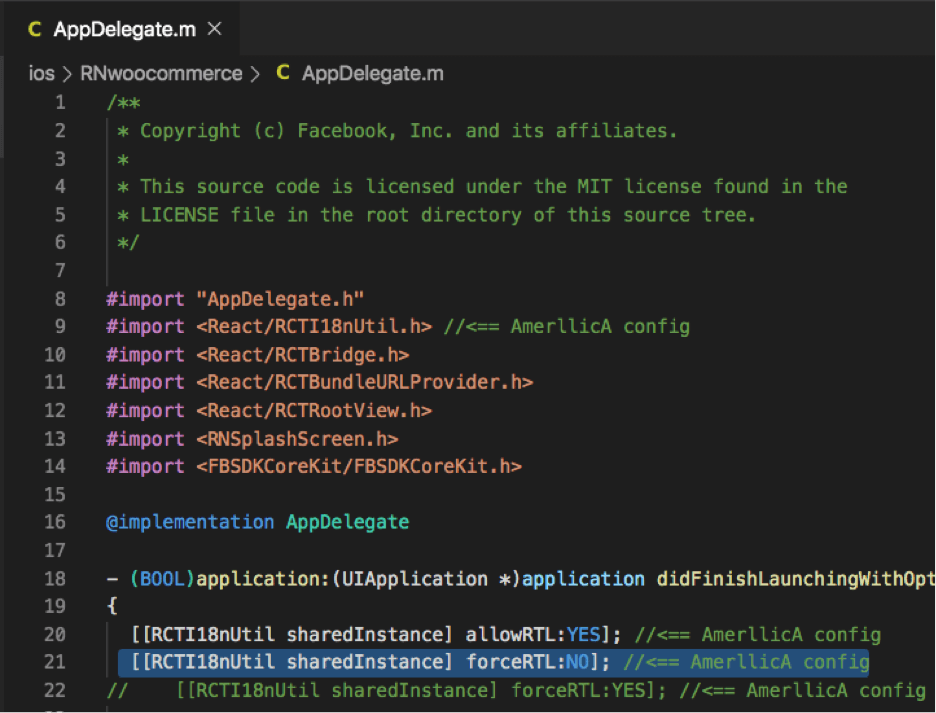
IOS
go into ios/RNBecrux/AppDelegate.m folder and change forceRTL() to YES
Facebook Integration
Facebook SDK Installation
https://developers.facebook.com/docs/react-native/getting-started
Facebook Developer Console
The first thing we need to do is to create a new application in Facebook’s developer dashboard, and this app is the one that Facebook will use to ask our users for their permission when we try to log them into our React Native application. For that, you’ll need to go to the
and create a new app
Add your Platforms to Facebook
Android
Add Facebook App ID
- Add your Facebook App ID to your app and update your Android manifest.
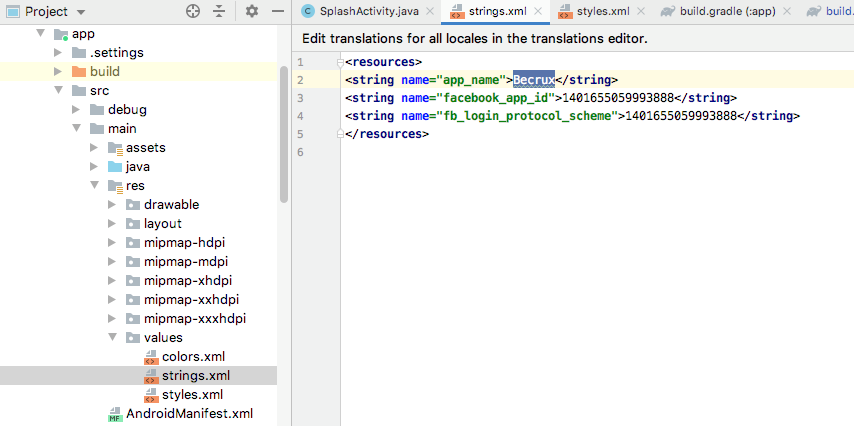
- Open your strings.xml file, for example:/app/src/main/res/values/strings.xml .
- Add a new string with the name facebook_app_id containing the value of your Facebook App ID:
<string name=”facebook_app_id”>…….</string>
Add your development and release key hashes
To ensure the authenticity of the interactions between your app and Facebook,
If your app has already been published, you should add your release key hash too.
You’ll have a unique development key hash for each Android development environment.
To generate a development key hash, on Mac, run the following command:
On Windows, run this command:
This command will generate a 28-character key hash unique to your development environment. Copy and paste it into the field below. You will need to provide a development key hash for the development environment of each person who works on your app. If your app has already been published, you should also add a hash of your release key.
Android apps must be digitally signed with a release key before you can upload them to the store. To generate a hash of your release key, run the following command on Mac or Windows substituting your release key alias and the path to your keystore:
This will generate a 28-character string that you should copy and paste into the field below. Also, see the Android documentation for signing your apps.
IOS:
Configure your info.plist and project settings
Find the .plist file in the Supporting Files folder in your Xcode Project.
1. Right-click your .plist file and choose “Open As Source Code”.
2. Copy & Paste the XML snippet into the body of your file
( <dict>…</dict> )
<key>CFBundleURLTypes</key>
<array>
<dict>
<key>CFBundleURLSchemes</key>
<array>
<string>……</string>
</array>
</dict>
</array>
<key>FacebookAppID</key>
<string>……</string>
<key>FacebookDisplayName</key>
<string>rn</string>
Push Notification
Put your ONESIGNAL APP ID here with your OneSignal google project number in your android/app/build.gradle folder.
android { defaultConfig { manifestPlaceholders = [
onesignal_app_id: ‘PUT YOUR ONESIGNAL APP ID HERE’,
// Project number pulled from dashboard, local value is ignored.
onesignal_google_project_number: ‘REMOTE’ ]}}

Generate Credentials
iOS – Generate an iOS Push Certificate
ANDROID – Generate a Google Server API Key
Deep linking
Configuring Android
First, we need to open our Manifest file and add the app name we will want to be referencing, in our case Becruxapp.
In android/app/src/main, open AndroidManifest.xml and change the android:host=” ” according to your link and you can also change android:scheme=” ”.

Configuring iOS
Step 1. Add URL type to info.plist
- Open plistand at the top of the file, create a new property called URL types
- Expand item 0(zero) and choose URL Schemes.
- Give item 0 or 1the name you would like your app to be linkable as. In our case, I chose tcshop.androidecommerce as the name.

Reference:
https://medium.com/react-native-training/deep-linking-your-react-native-app-d87c39a1ad5e
Config Android
Open file android/app/src/main/res/values/strings.xml and change to your App name
Don’t forget clean cache after change app info.
cd ./android && ./gradlew clean
Publishing to Google Play Store
Publishing to Apple Store