From Where to Begin?
Well, after reaching the above-mentioned step, you need to begin with the Website/CMS Source Code Zip file. Extract the files and upload to public_html directory on your server. The extracted files would appear all Laravel source code files.
You need to grant the directory permissions 775 to respective directories below.
- public_html/bootstrap/cache/
- public_html/storage/framework/
- public_html/storage/logs/
Now you just need to enter your website domain name like https://your-site.com/install in any browser and an installation wizard would automatically pop up on the screen.
After uploading the source code, once we click it, this would open up by default an installation wizard.
To make the installation process smooth and user friendly, we have come up with a bit more innovative manner of installation where the user would be provided with an installation wizard, user would be required to keep putting the appropriate values in the relevant fields and the installation process would not take more than just a couple of minutes.
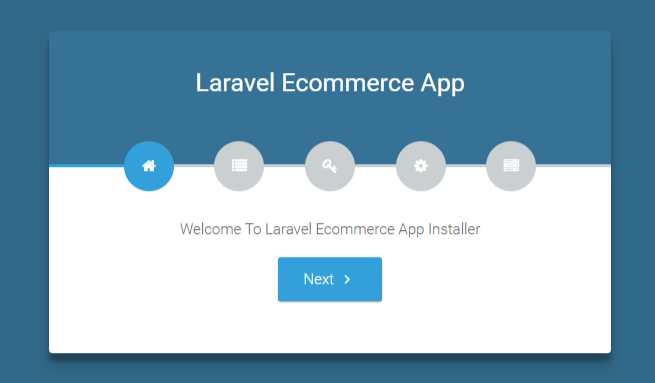
The first installation wizard step will shows Laravel Ecommerce App title is a welcome note to the user. By clicking on the Next button, it will move to dependencies screen.
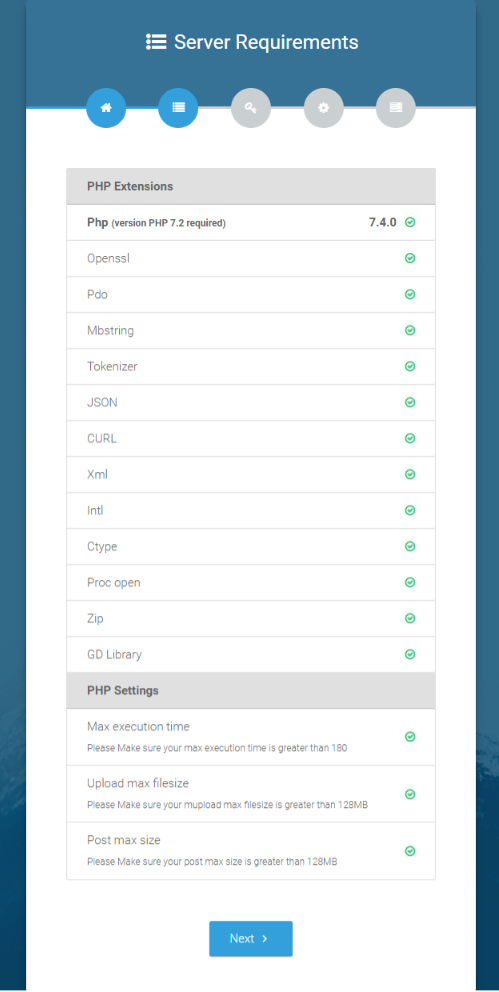
The dependencies or php extensions for the server that are essential for laravel project installation. All the green checks would ensure the presence of all the above mentioned dependencies. In case, if the system doesn’t have any of these dependencies already installed, a red cross mark would appear in the corresponding column of the missing component. So make sure to install all the dependencies and extensions to ensure the smooth running and installation of the app. After setup all extensions just refresh the page and green checkmark will shows on correspondent columns.
By clicking the next, the wizard would ask for the permissions.
You need to grant the directory permissions 775 to respective directories below.
- public_html/bootstrap/cache/
- public_html/storage/framework/
- public_html/storage/logs/
To grant these permissions. Open your cpanel file manager, locate the above directories and right-click on it, and now click on the change permission and enter the relevant value 775, and click on the change permission button.
In the same manner, grant permissions to the all folders that is mentioned above.
Once all the permissions are granted, refresh installer page and all three folders would show a green checkmark on correspondent columns. From here click the next button.

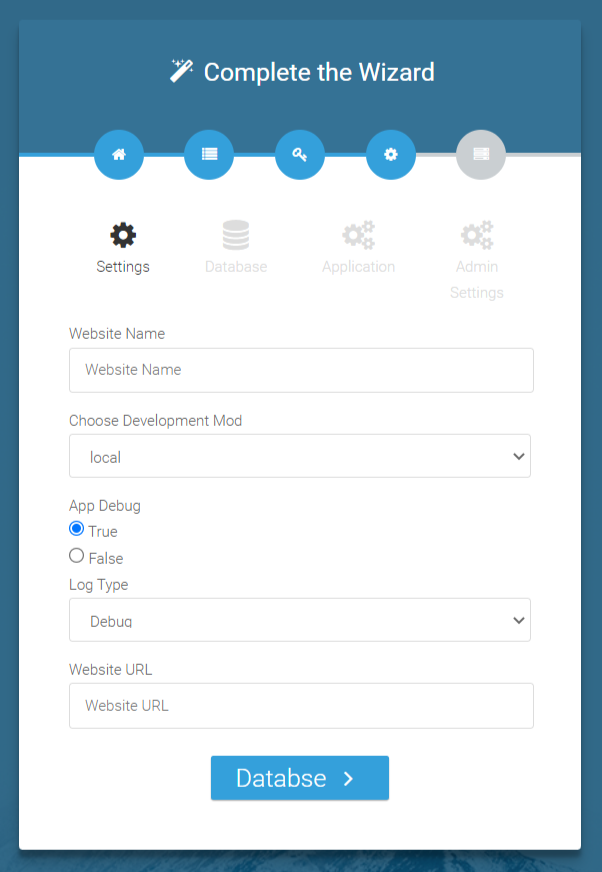
In the next step, you need to complete the environment settings wizard.
By clicking the Wizard Text Editor next slide will show up some text fields.
Step 1) Give any name to your Website as you like i.e Namal-eCommerce-Solution.
Step 2) From development mode that carries the following option(s)
- Local
Step 3) In App Debugging section, there are two further options that are
1) True
2) False.
By clicking the true, all the errors would be shown
By clicking the false, no errors would be shown.
Step 4) In Log Type section select debug.
Step 5) In Website URL section, paste your website URL and click on the database on the bottom of the wizard.
In the next wizard section, you will be required to enter your database information.
To begin with this, you need to create an empty database first in your PHPMyAdmin, enter all of the details of that empty database in the above wizard, and click on the application on the bottom of the wizard.

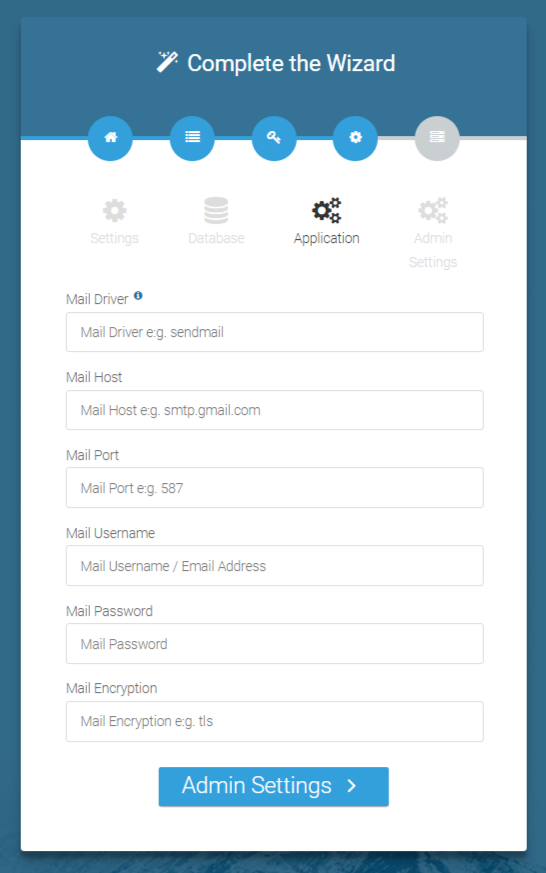
Make sure to also configure your mail settings in the wizard shown below.
In the final phase, enter your purchase code details and press submit. Installer will run migration and seeder and setup all database tables/views in given database.

Your website will be live on following link.
https://your-site.com/
Admin:
https://your-site.com/admin/login
Owner Login:
username: owner@email.com
password: 123
Admin Login:
username: admin@email.com
password: 123
Manager Login:
username: manager@email.com
password: 123
Purchaser Login:
username: purchaser@email.com
password: 123
Accountant Login:
username: accountant@email.com
password: 123
Data Entry Operator Login:
username: dataentry@email.com
password: 123
Biller/POS Login:
username: biller1@email.com
password: 123
Biller2/POS Login:
username: biller2@email.com
password: 123
INSTALLATION WARNING!
We have different environment and os in development.
- Xamp
- Lamp
- Wamp
- (Live server) Cpanel
- Others
Our laravel installer works perfect on every environment, However some exceptions may occur on environment to environment change .
For Example
Sometime user provide wrong credentials for database, which gives an exception. In case of exception, you need to run installer again.
if user face session expire (it occurs due to providing wrong credentials many time) page after providing wrong credentials on live server, user must clean laravel cache on live server.